Simple Delivery (for Store or Post Parcel)
Business Scenario
This is the most simple scenario to demonstrate how kandbox dispatch works. This can work for post delivery or for a simple online store to distribute products to its customer after online shopping. In this guide, we use a store delivery as an example.
In London, kStore offers online shopping platform. All online orders are delivered from a fulfilment center (or depot). kStore has 2 workers and 8 orders each day.
kStore wants to create workers and jobs by API, and then plan the jobs to workers to get an optimized sequence to minimize total travel distance.
All codes in this example can be found in repository: KDClient .
Prerequisite
- You should already have a Kandbox Dispatch Account. If not, please go to kandbox dispatch to register one account.
- To run the sample python program, you should have python installed in your environment. We are building the client example by Python and Restful APIs. VSCode is our preferred IDE. The HTTP scripts are coded in rest-client format.
Execute the Example Python Program in one go
The first step is to clone the repository to your local computer:
git clone https://github.com/kandboxAI/dispatch_clientThen install the required packages to your python environment:
cd kdclient
pip install -r requirements.txt
Configure the required environment variables with the information you have registered to Kandbox Dispatch:
# export server_url=http://_server_url_/kd/api/v1
# export email=_email_@email.com
# export password=_pass_
# export team_code=_team_
Then you can run the london_simple demo program by:
python ./src/london_simple.pyAfter the program finish, you should be able to view the planned route in the Web UI.
Run APIs Step by Step
The previous Python program executes several steps in one go. To learn and test the APIs one by one, you can follow steps in this section. This sequence is also the sequence of API being used in the previous python program.
Create a team
To use the restful APIs, you should first use the Login API to get a token for each sub-sequent API calls.
POST {{hostUrl}}/auth/login
Content-Type: application/json

{"email": "{{user}}", "password": "{{pass}}"} url = f"{self.service_url}/auth/login"
login_info = {"email": username, "password": password}
response = self.requests.post(
url, json=login_info, headers={"Content-Type": "application/json"},
)With the token, we will create our team at London with this API call:
POST {{server_url}}/teams/
Authorization: Bearer {{jwtoken}}
Content-Type: application/json

{
    "code": "london", "name": "london",
    "geo_longitude": -0.193837,
    "geo_latitude": 51.49161,
    "planner_service": {"code": "single_area_code_cvrp"},
    "flex_form_data": {
        "fixed_horizon_flag": "1",
        "env_start_datetime": "2024-02-14T00:00:00",
        "horizon_start_datetime": "2024-02-14T08:01:01",
        "nbr_minutes_planning_windows_duration": 2880
    }
}
The major difference between this guide and [getting-started] is that we are fixing the planning window for testing purpose by setting the parameter "fixed_horizon_flag" = 1. In production system, we should keep it online, not fixed, i.e. "fixed_horizon_flag" = 0. Parameter "horizon_start_datetime" is effective only when "fixed_horizon_flag" == 1.
Create Workers
With the token and the team we have created, we can create the workers one by one with this API call:
POST {{server_url}}/workers/   HTTP/1.1
Content-Type: application/json
Authorization: Bearer {{jwtoken}}

{
    "code": "w1",
    "name": "w0",
    "team": {"code": "{{team_code}}"},
    "geo_longitude": -0.1938377,
    "geo_latitude": 51.49161,
    "flex_form_data": {"area_code": "A", "capacity_volume": 0, "max_nbr_order": 0},
    "business_hour": {
        "monday": [{"open": "0005", "close": "2330", "id": "a0", "isOpen": true}],
        "tuesday": [{"open": "0005", "close": "2330", "id": "a1", "isOpen": true}],
        "wednesday": [{"open": "0005", "close": "2330", "id": "a2", "isOpen": true}],
        "thursday": [{"open": "0005", "close": "2330", "id": "a3", "isOpen": true}],
        "friday": [{"open": "0005", "close": "2330", "id": "a4", "isOpen": true}],
        "saturday": [{"open": "0005", "close": "2330", "id": "a5", "isOpen": true}],
        "sunday": [{"open": "0005", "close": "2330", "id": "a6", "isOpen": true}]
        },
    "auto_planning": true,
    "is_active": true
}
It is recommended to reset the planning env after you have created the workers.
POST {{server_url}}/planner_service/reset_planning_window/   HTTP/1.1
Content-Type: application/json
Authorization: Bearer {{jwtoken}}

{"team_code":  "{{team_code}}"}
Create Jobs
Now we can add jobs to this team. In this guide, we will run only batch planning, which means to set auto_planning=false.
With the token and the team we have created, we can create the jobs one by one with this API call:
POST {{server_url}}/jobs/  HTTP/1.1
Content-Type: application/json
Authorization: Bearer {{jwtoken}}

{
    "code":"A5-0",
    "team": {"code": "{{team_code}}"} ,
    "job_type": "visit",
    "auto_planning": false,
    "is_active": true,
    "planning_status": "U",
    "geo_longitude": -0.168417,
    "geo_latitude": 51.461233,
    "requested_start_datetime": "2024-02-14T07:06:40",
    "requested_duration_minutes": 0.5,
    "flex_form_data": {
        "area_code": "A"
    }
}
Run Batch Planning
After you have created all the jobs, you can call trigger the planning action by this API.
POST {{server_url}}/planner_service/run_batch_optimizer/   HTTP/1.1
Content-Type: application/json
Authorization: Bearer {{jwtoken}}

{
    "team_code": "{{team_code}}",
    "area_codes": "A"
}
Read the planning result
You can use this api to get the planned jobs for any worker.
POST {{server_url}}/planner_service/get_env_jobs/ HTTP/1.1
Content-Type: application/json
Authorization: Bearer {{jwtoken}}
{
"team_code": "{{team_code}}",
"worker_codes": "w0",
"reset_start_datetime": false,
"active_only":false
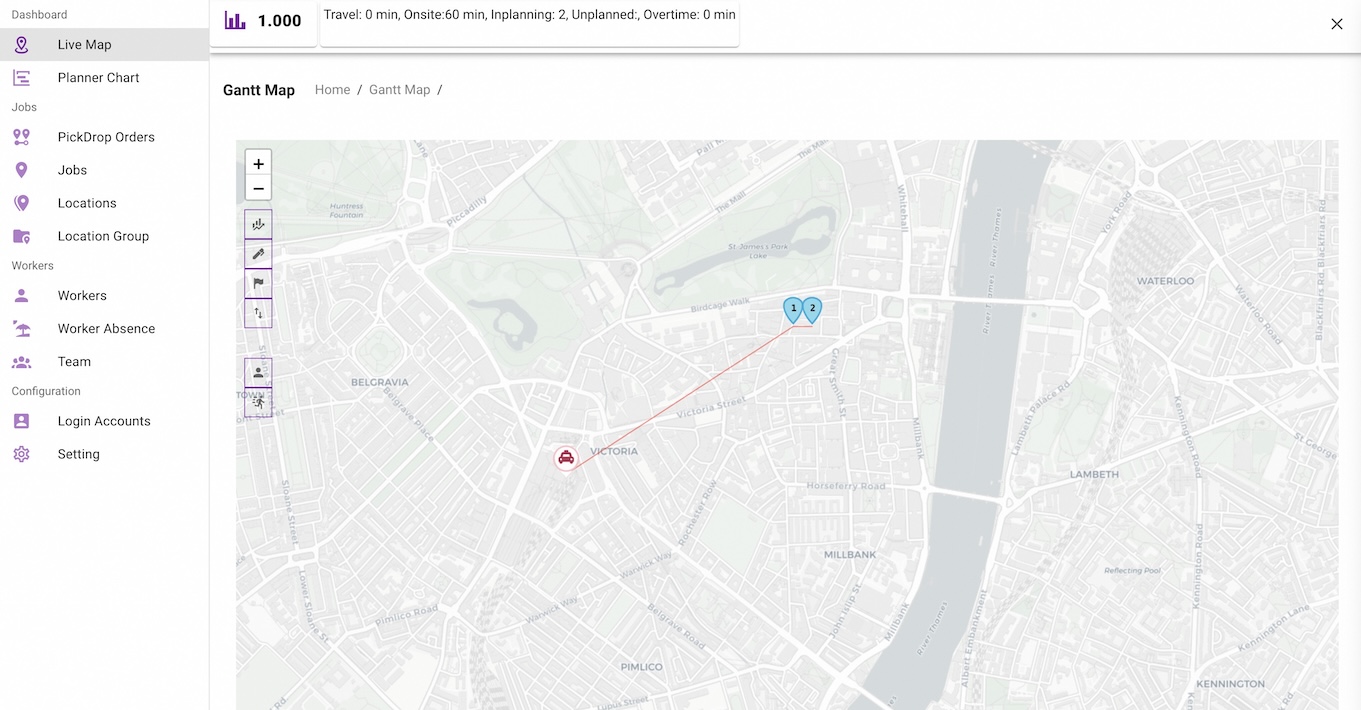
}Review the planned result in the Web UI
After the planning is done, you can login to the Kandbox Dispatch platform. You should be able to see a map of central London with planned workers and jobs on the map.